
Attach options to a product
The Product Options panel is where a plain product becomes one a customer can configure. You attach the option sets and add the fields and uploads the product needs, and the customer picks from them on the product’s own page.
The idea
Section titled “The idea”A shop with twelve colours and seven sizes faces 84 WooCommerce variations for one hoodie: generate them, price them, keep them straight, wait while the admin loads. Option sets are the way out. You attach a colour set and a size set to a simple product, and customers pick from the same swatch chips and size pills a variable product would show. No variations are created, so there is nothing to generate or scroll through. A choice that does run out can still hold its own count.
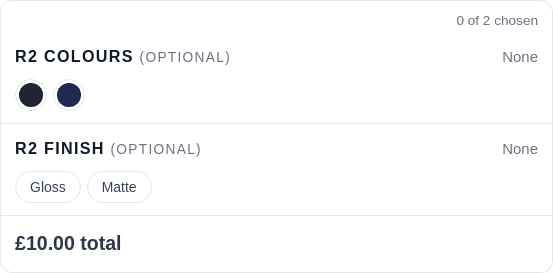
Both live side by side. Reach for option sets when the choice does not need its own SKU (most colour and size runs), and note that a choice can still hold its own count if it runs out. Keep real variations when each combination needs a SKU of its own, the size run you pick in the warehouse. You can even add option sets on top of a variable product; see options on variable products.
Attach a set
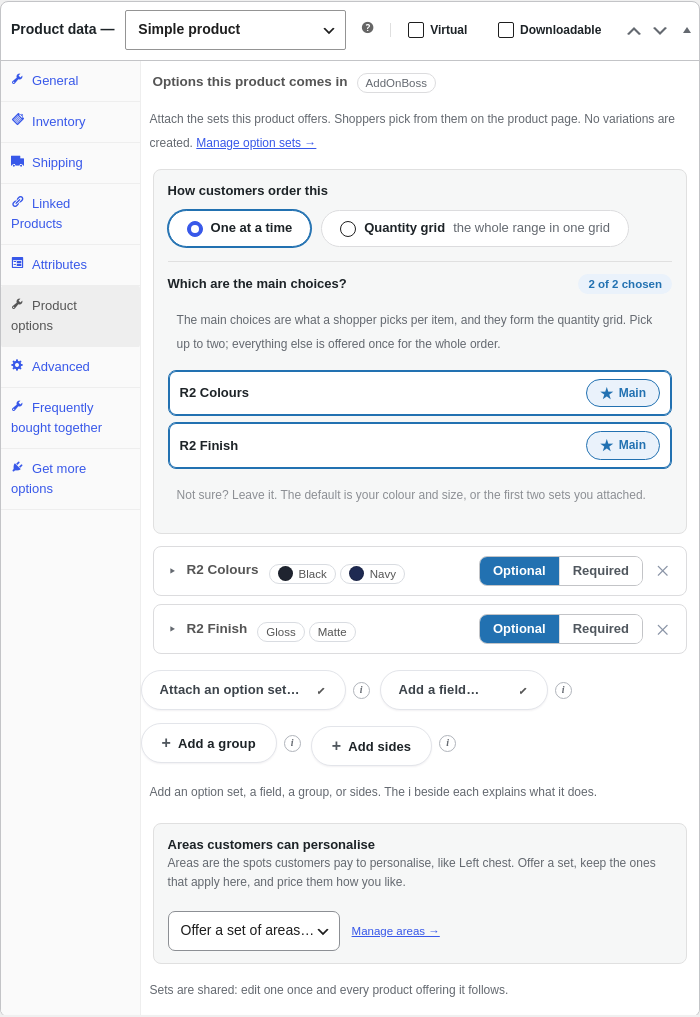
Section titled “Attach a set”On a simple product’s edit screen, open the Product Options panel:
- Choose a set from the add bar and attach it. Attach as many as the product needs, a colour set and a size set for a shirt.
- Mark a set Required if the customer must choose (a size), or leave it optional.
- Override any option's price where this product differs from the set, say 4XL is +4.00 on a heavy hoodie but +2.00 on a tee. Blank uses the set's own price.
- Update the product.
That is all the product needs. Its page now offers the choices, and the price follows every pick.
Start from another product
Section titled “Start from another product”If a product you already configured has the setup this one needs, take it instead of rebuilding it:
- On the new product's Product Options panel, open Start from another product.
- Search by product name or SKU. Only configured products are offered, each with a note of what it carries.
- Tick the parts you want. Option sets and Fields are separate ticks, as are Print areas, Quantity breaks and Layout.
- Press Take these parts. What you ticked lands on the page for you to adjust and save.
A tick you leave off is not touched. Take the fields from another product and the option sets you arranged on this one stay exactly as they were, in the order you put them. Tick both and you get that product’s whole arrangement, replacing what was here.
A field that lives inside a section arrives with its section, carrying only the kind of row you ticked, so the shape you built is kept rather than dropped loose at the end of the list.
If you have unsaved changes, it asks first: Take anyway proceeds, Keep my changes leaves everything as it was. What lands is a copy, so editing this product never changes the one you took from. Photos set per choice stay behind: they belong to the product that has them.
A product with no price is not purchasable in WooCommerce, so its Add to cart area, and the options with it, never show. Set a price on the General tab and they appear. Zero is a valid price: use it when the options are meant to be the whole price. The panel reminds you if the price is blank.
Add fields and uploads
Section titled “Add fields and uploads”The same panel takes fields a customer fills in (a name to print, a message, a number, a tick box, a dropdown) and a file upload for a logo or print-ready artwork. Each field can be optional or required and can carry a charge. They sit alongside the sets and flow to the order with the picks. See custom fields and file & artwork uploads.
Group what belongs together
Section titled “Group what belongs together”When a product carries several sets and fields, group the ones that belong together under a heading, “Garment” and “Personalisation” for example. A group is a plain titled section on the storefront; grouping never changes how anything is priced. Drag rows to reorder them, and drag them in and out of groups. A group can start collapsed in the editor to keep a long configuration tidy while you work.
A group of fields can also be asked for more than once, one whole block per engraving or per item bought, with each field keeping its own charge. See a group of fields repeats as one block.
Show the groups chooses how the groups are laid out on the page: One after another, the plain stacked flow every build has, or Folding sections, part of AddOnBoss Pro, where optional groups fold behind their headings and open on a tap. Whichever you choose, a group the shopper has to answer is never folded away, and a folded group’s header always shows the current choice, so nothing required ever hides.
How the price shows
Section titled “How the price shows”Each choice states its own price right on its chip, so a customer reads “4XL is £26”, never a surcharge aimed at them. Sizes that cost the same all show the same price, so no single choice is singled out; a set that is all one price (your colours) shows no prices at all. The price a customer sees is the product’s price plus the choices, so set the product’s price to your everyday version and let dearer choices add from there.
Beneath the options, a receipt itemises what the figure is made of: the product on its own line, each charged choice on its own, and a plain Total under them, updating with every pick. A customer never takes the price on trust, because the breakdown that produced it is right there.
Charges resolve on the server from your saved sets, never from anything the browser sends, and every figure follows your shop’s tax display setting. See pricing & fees for the full detail.
Give your options a photo
Section titled “Give your options a photo”An option can carry its own photo, so a colour chip shows the garment in that colour and picking it swaps the product’s main image the way a variation would. You do not have to set them one by one: Suggest photos reads the product gallery and your media library and matches a photo to each option by name. See option photos.
Reveal a set only when another is chosen
Section titled “Reveal a set only when another is chosen”A set can wait, shown but locked, until an earlier set has a certain value, so a customer reads the whole page yet only fills in what applies to them. See conditional options.
Order the whole range at once
Section titled “Order the whole range at once”When a product carries a colour and a size, you can turn on a quantity grid so a customer sets a quantity for every colour and size and adds the whole run to the basket in one go. See quantity grid.