
Per-item personalisation
Personalisation is part of the Builder. It is fully opt-in: a bundle with no add-on fields behaves exactly as before.
What it is
Section titled “What it is”Personalisation lets customers fill in details for an item, with optional charges. It is built for team kit, workwear and promotional products: a name and number on each shirt, a logo across a set, a gift message in a hamper.
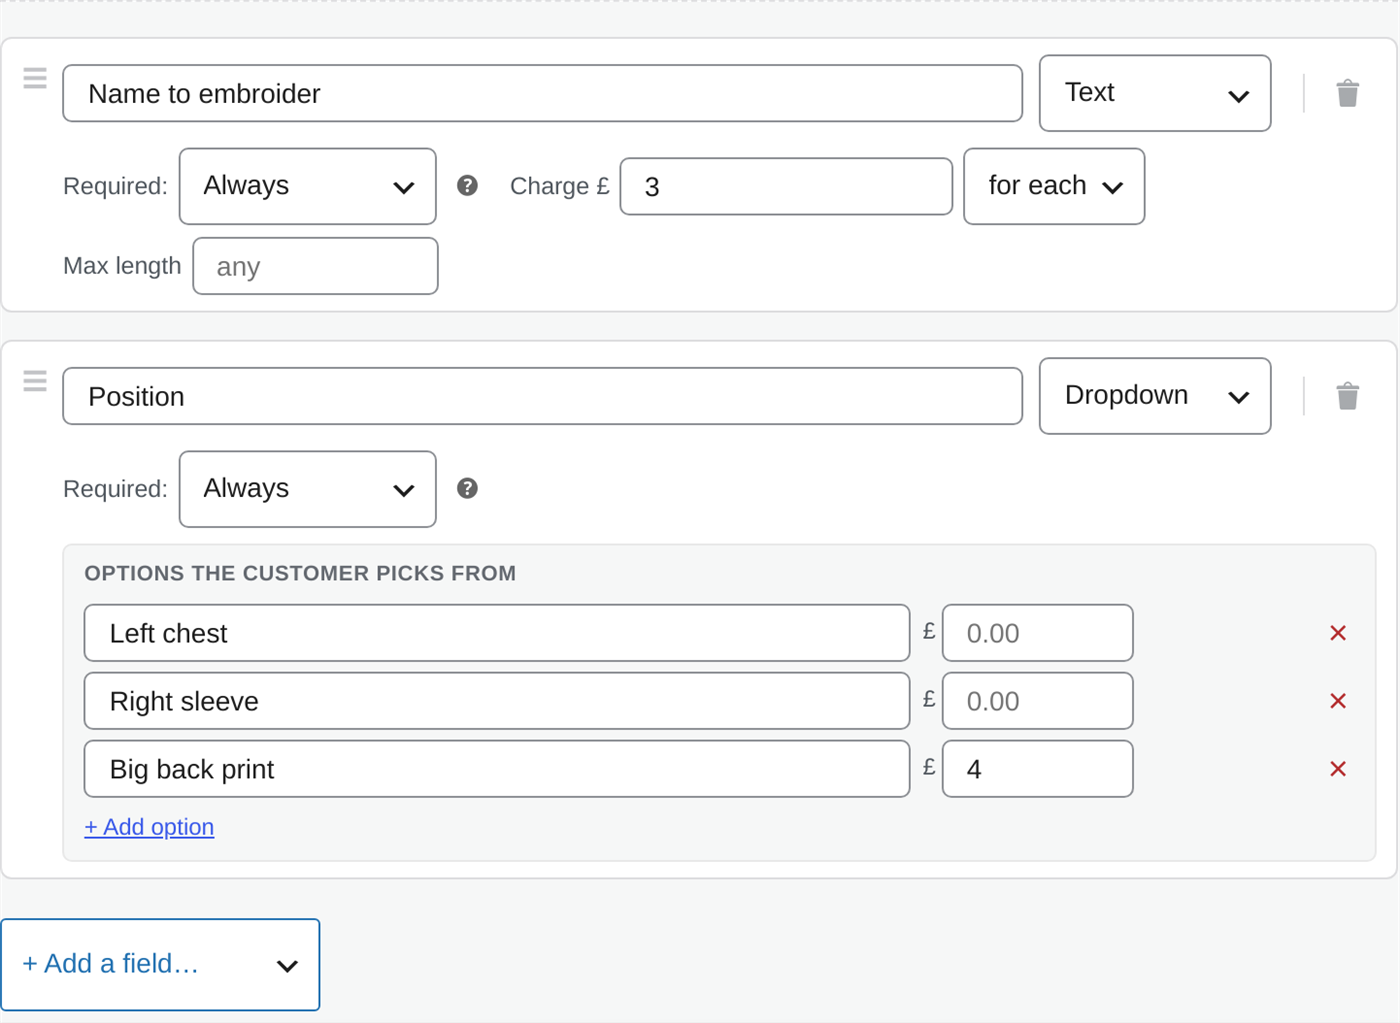
Add a field
Section titled “Add a field”On a bundle item, switch on the Personalisation on this item row, click Edit fields, then + Add a field:
- Pick a ready-made field (Name / text, Gift message, Dropdown of options, Tick box, Number, Section label) or “Custom”, and give it a label.
- Dropdown options are a plain list: type each option’s label and an optional charge in the £ box. No codes.
- Charge: a flat amount “for each”, “once”, or “per letter”; dropdowns charge per option.
- Required: Optional, Always, or If personalising (required only once the customer starts filling the item in, so a position that only matters when there is a name is skipped, and not charged, when there is none).
- Drag the grip to reorder fields.
Per unit or once per item
Section titled “Per unit or once per item”Each field is captured either per unit (a name on each shirt) or once per item (one logo for the whole set). You decide per field, so a team order can collect a different name for every shirt and a single shared crest.
What customers see
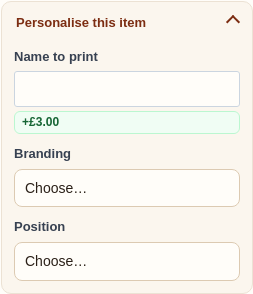
Section titled “What customers see”Each unit gains a “Personalise this item” button. What the customer enters, and any charges, appear in the live total, the cart, the order, the confirmation email, and the warehouse pick list, so staff see exactly what goes on each item.
Logo and file upload
Section titled “Logo and file upload”For artwork, add a File upload field with a maximum size. Customers upload a JPG, PNG, GIF, WEBP or PDF while configuring, and the file shows as a download link on the order and the pick list. Set it to “once for the set” for one shared logo, or “for each one” if every item gets its own.
Uploaded files are personal data, so BundleBoss includes them in WordPress’s privacy export and erase tools, and a daily job clears uploads from configurations that were never ordered.
Whole-order personalisation
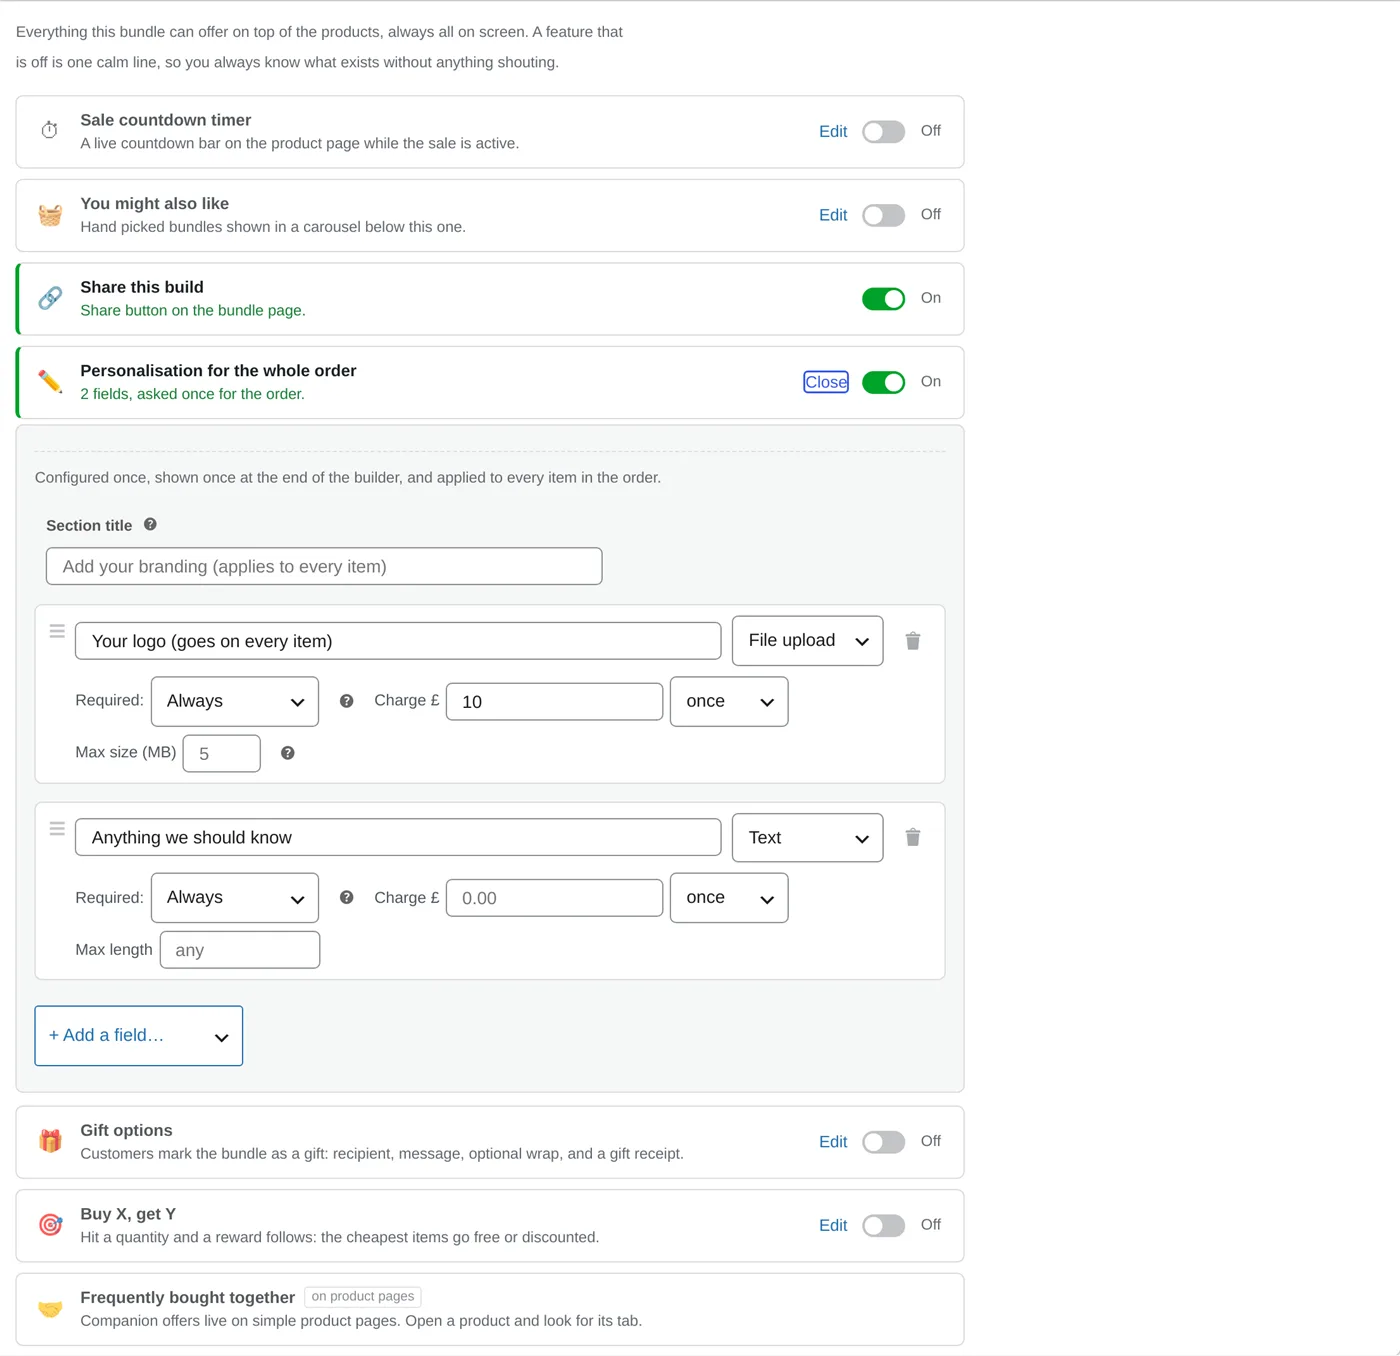
Section titled “Whole-order personalisation”Some details belong to the order, not to any one item: a company logo that goes on everything, a delivery instruction, a setup charge. Switch on Personalisation for the whole order under Bundle Promotions and build its fields the same way; each is asked once for the entire bundle, and a fee there is charged once no matter how many items or copies the order holds.
The section carries your own title on the page (“Add your branding”, or whatever fits your shop), and everything entered flows to the order and the pick list alongside the per-item details.
On a simple product’s own page
Section titled “On a simple product’s own page”Fields on a simple product’s own page, with no bundle involved, moved to AddOnBoss in 5.0.0. An engraving line, a monogram, a rush note or a logo on a product you sell on its own belongs there now.
- Fields covers the field types and how each one charges.
- Product options covers attaching them to a product.
- Conditional options covers showing a field only when another choice is made.
Everything a customer fills in still reaches the cart, the order, the confirmation email and the pick list in the same way, whichever of the two collected it.
Use the Compact cards display for personalised multi-unit items: each unit gets its own tidy card with room for its fields. Per-unit personalisation and a quantity grid are mutually exclusive (a grid has no addressable units to name), but a single shared logo sits happily alongside a grid order.